
![]()
Log in Shopkeeper

The Setup Process: Discount Percentage Setup
ขั้นตอนการตั้งค่า: การตั้งค่าเปอร์เซ็นต์ส่วนลด
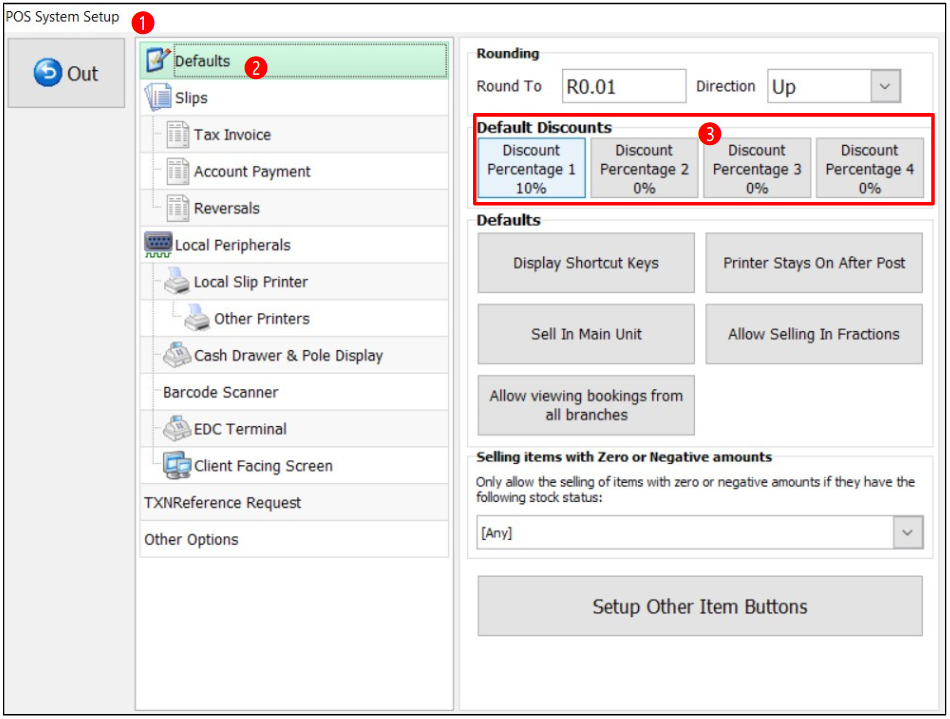
❷ Select the Default from the list
➌ Default Discounts: select on of the Discount Percentage 1 / 2 / 3 / 4 buttons
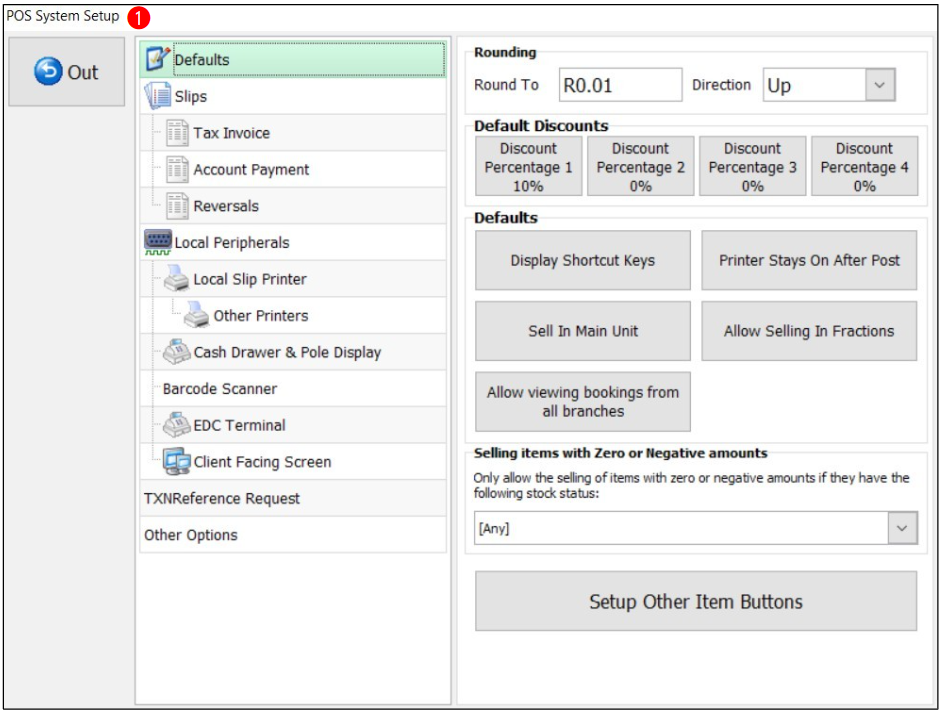
❶ POS System Setup window
หน้าต่าง POS System Setup
❷ Select the Default from the list
➌ Default Discounts: select on of the
Discount Percentage 1 button
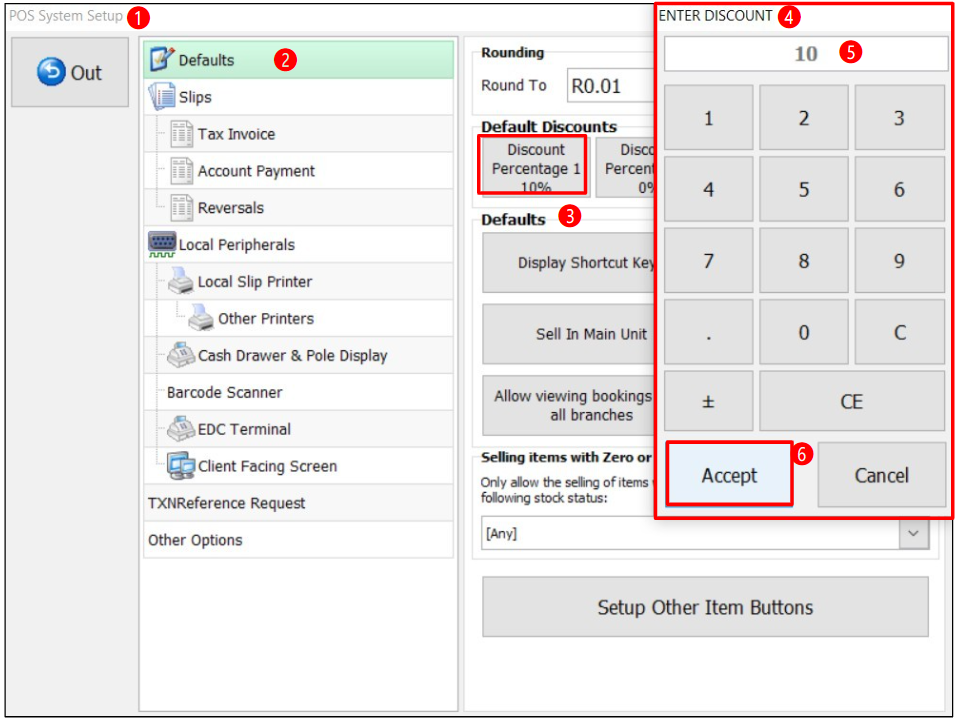
➍ Enter Discount window
หน้าต่าง Enter Discount
❺ Type in the discount
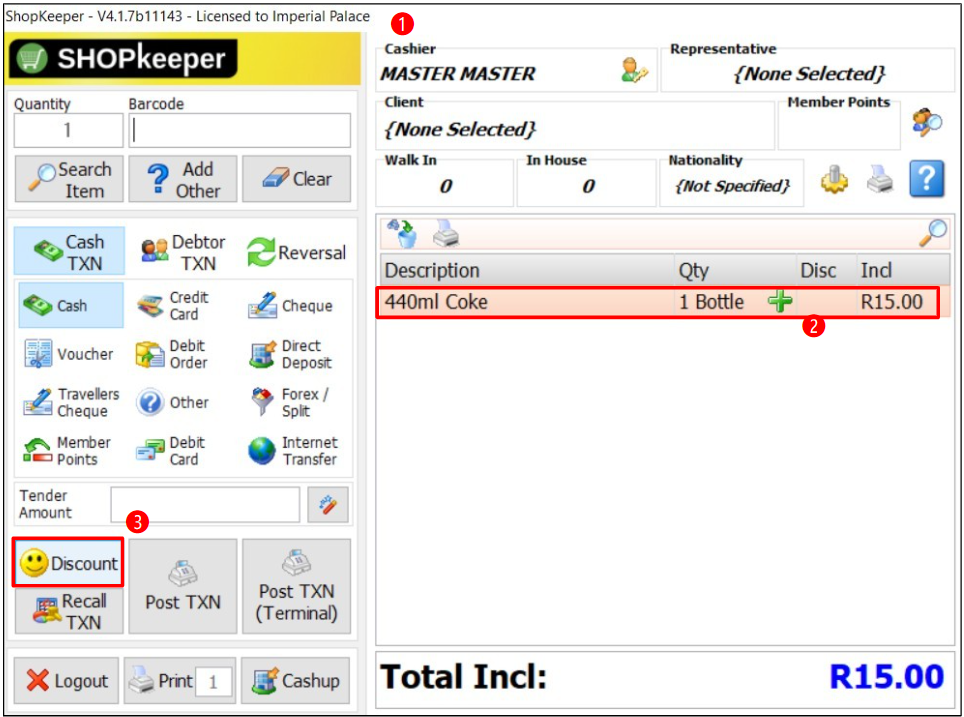
❶ ShopKeeper POS window
หน้าต่าง ShopKeeper POS
❷ Locate & Select: select to highlight the from the list Production Requiring Discount
ค้นหาและเลือก: เลือกรายการที่ต้องการใช้ส่วนลด
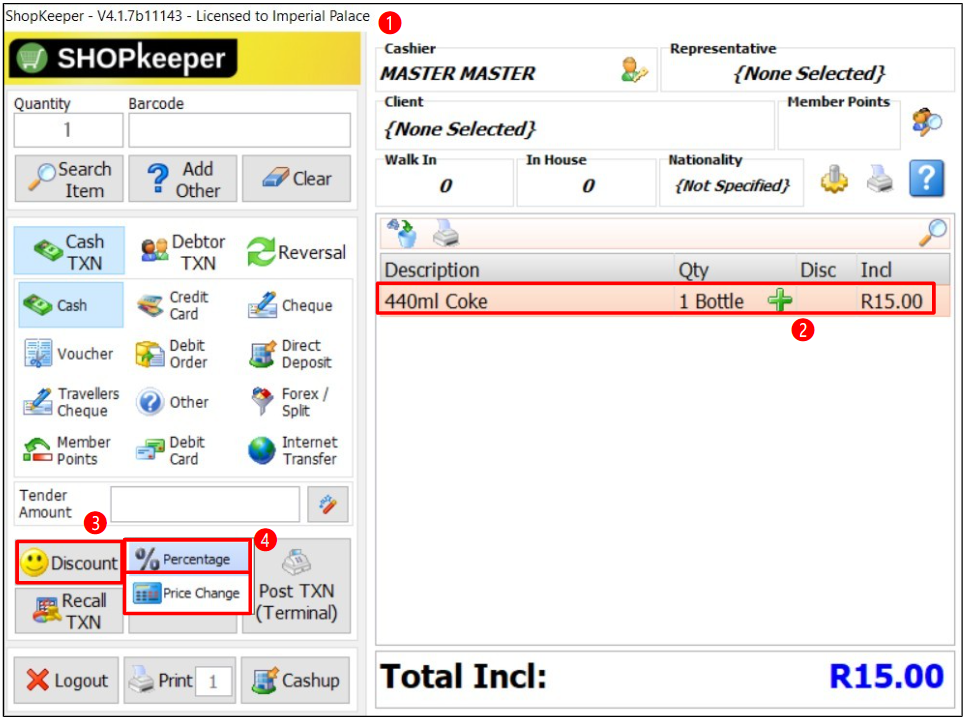
❶ ShopKeeper POS window
หน้าต่าง ShopKeeper POS
❷ Locate & Select: select to highlight the from the list Production Requiring Discount
ค้นหาและเลือก: เลือกรายการที่ต้องการใช้ส่วนลด
➌ Select the Discount button
เลือกปุ่ม Discount
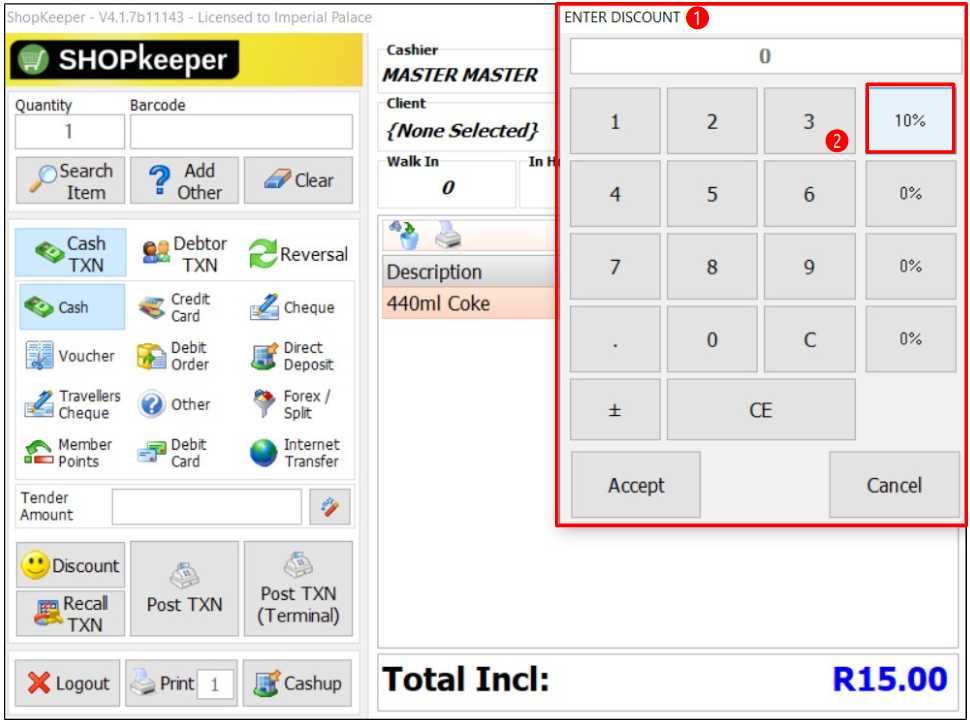
❶ Enter Discount window
หน้าต่าง Enter Discount
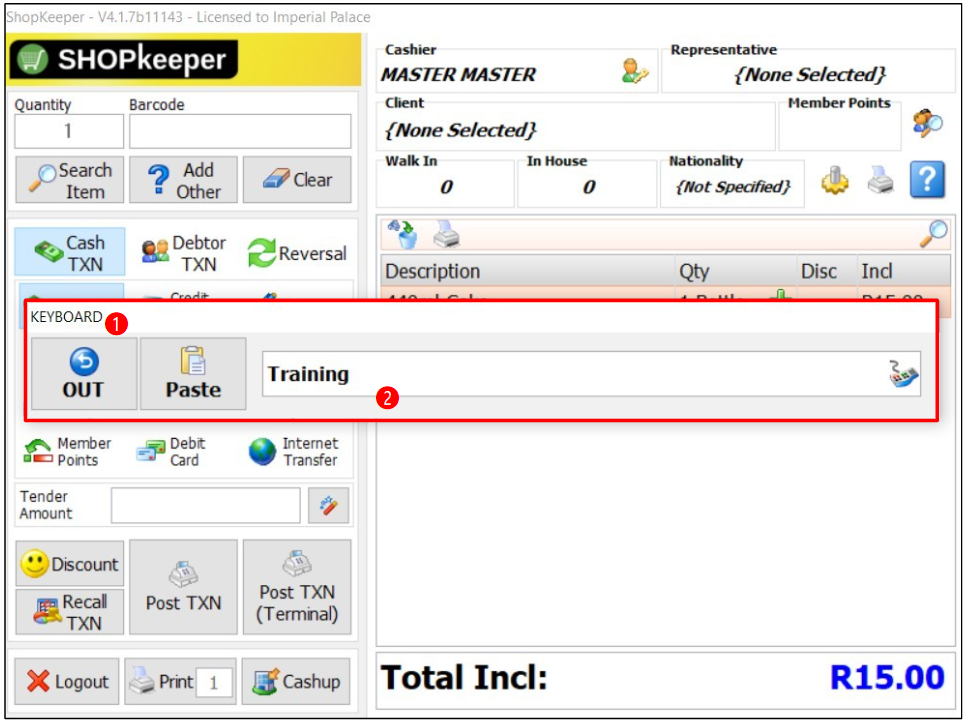
❶ Keyboard window
หน้าต่าง Keyboard
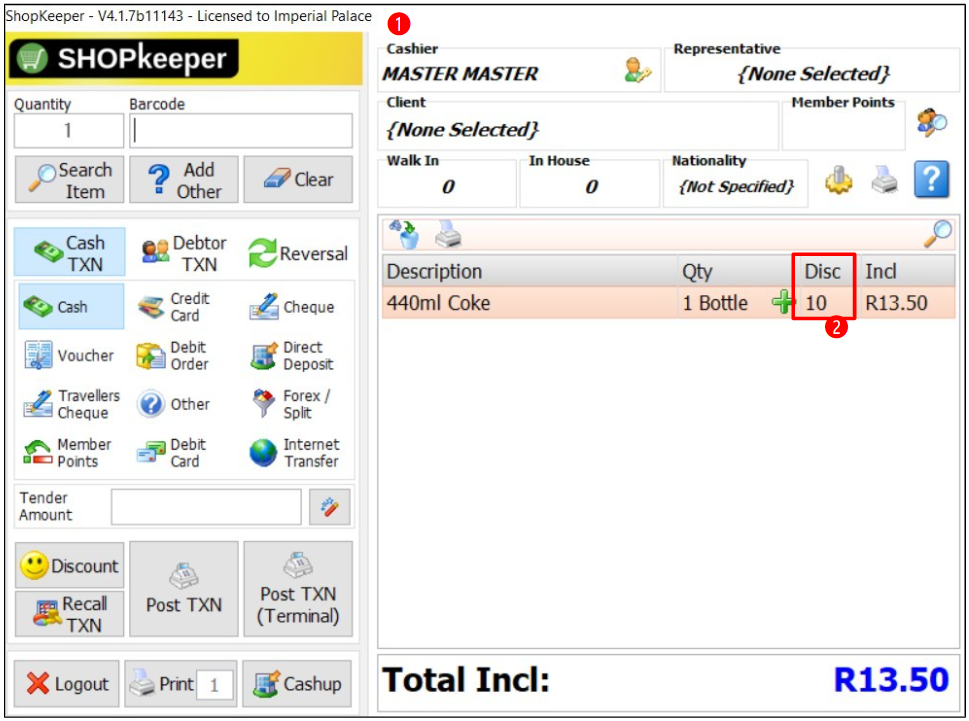
❶ ShopKeeper POS window
หน้าต่าง ShopKeeper POS
The Setup Process: Display Shortcut Keys
กระบวนการตั้งค่า: แสดงปุ่มคีย์ลัด
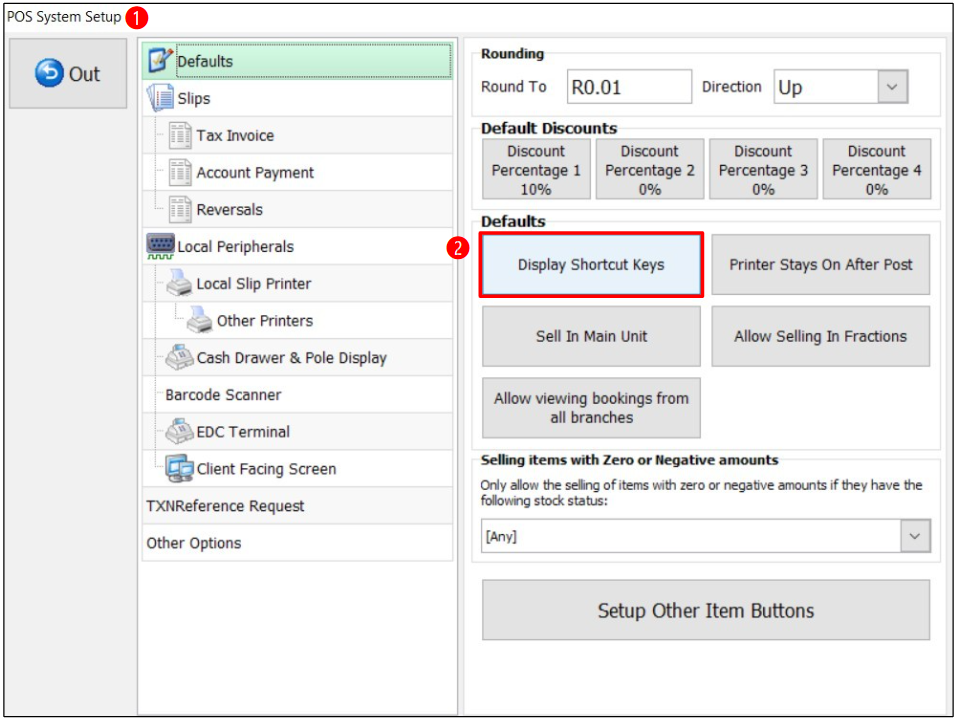
❶ POS System Setup window
หน้าต่าง POS System Setup
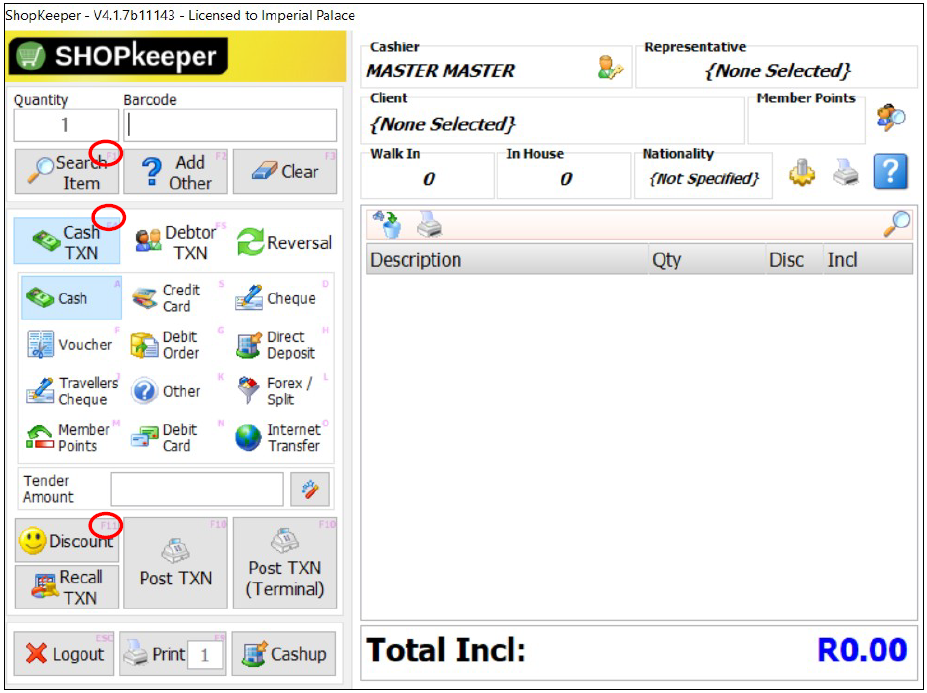
❶ ShopKeeper POS window
หน้าต่าง ShopKeeper POS
❷ Located on the Top Right Hand Corner of Each Button you will see the Keyboard shortcut of each button:
- Search – F1
- Cash TXN – F4
- Discount – F11
- ค้นหา - F1
- ธุรกรรมเงินสด - F4
- ส่วนลด - F11
The Setup Process: Selling Stock - Zero / Negative Counts
กระบวนการตั้งค่า: การขายสินค้า - จำนวนที่เป็นศูนย์ / ติดลบ
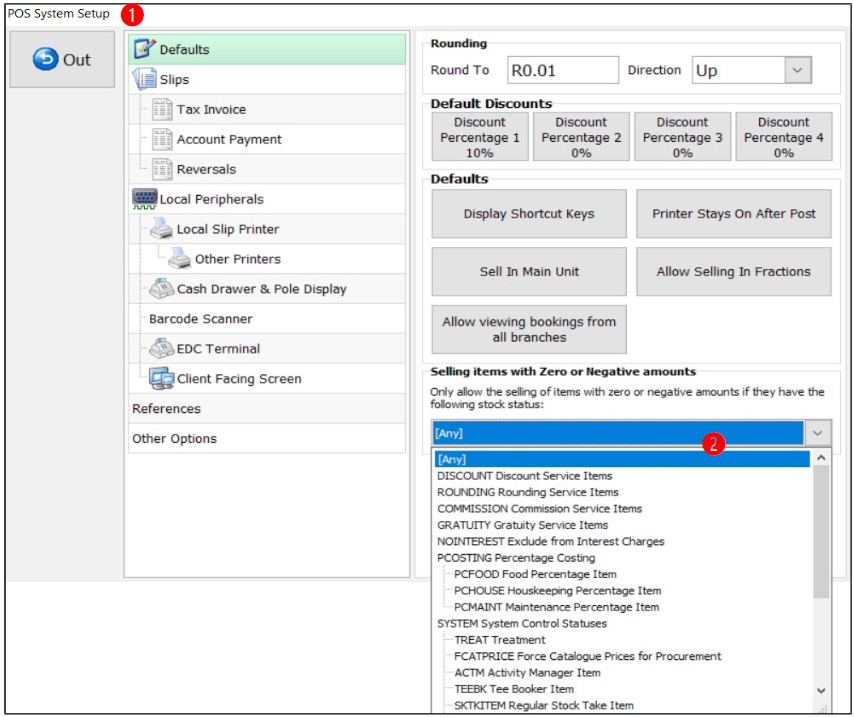
หน้าต่าง POS System Setup
❷ Selling Items With Zero or Negative Amounts: use the drop down to
การขายสินค้าที่มีจำนวนเป็นศูนย์หรือติดลบ: ใช้เมนูดรอปดาวน์เพื่อเข้าถึงรายการ
Note: if you select a singular Status, only items with that Status will be allow to be sold with Zero / Negative amounts.
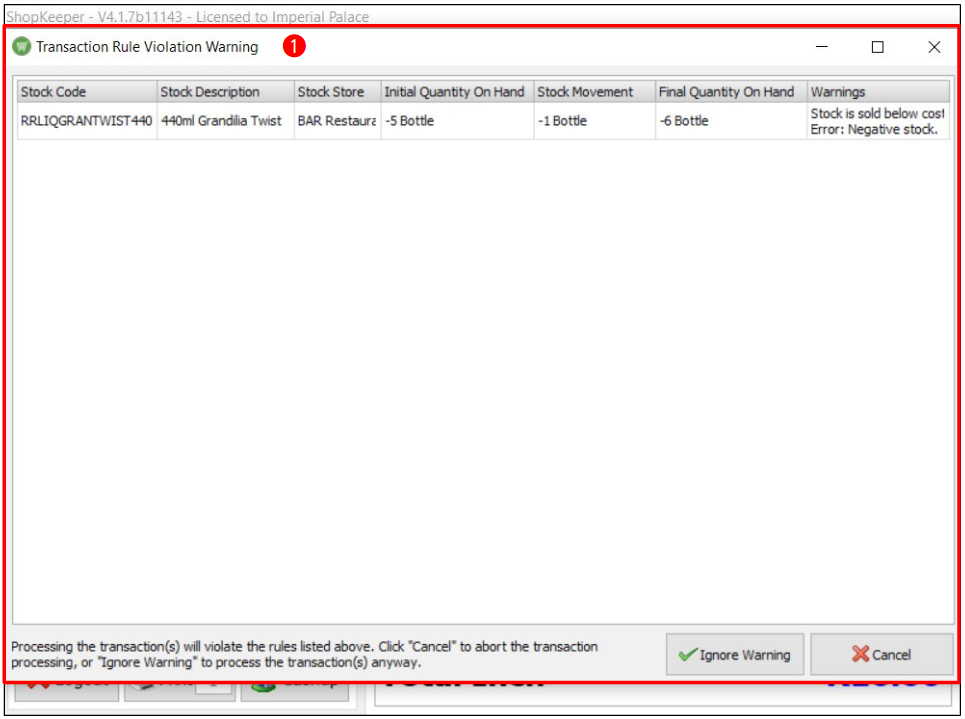
❶ Transaction Rule Violation Warning window
หน้าต่าง Transaction Rule Violation WarningNote: It is important to adhere to these warnings, this means you have a stock issue that needs to be rectified as soon as possible. Always check your stock holding before you process Transactions to avoid voids and unhappy clients
The Setup Process: Setup Other Item Buttons
กระบวนการตั้งค่า: ตั้งค่าปุ่มสินค้าอื่นๆ
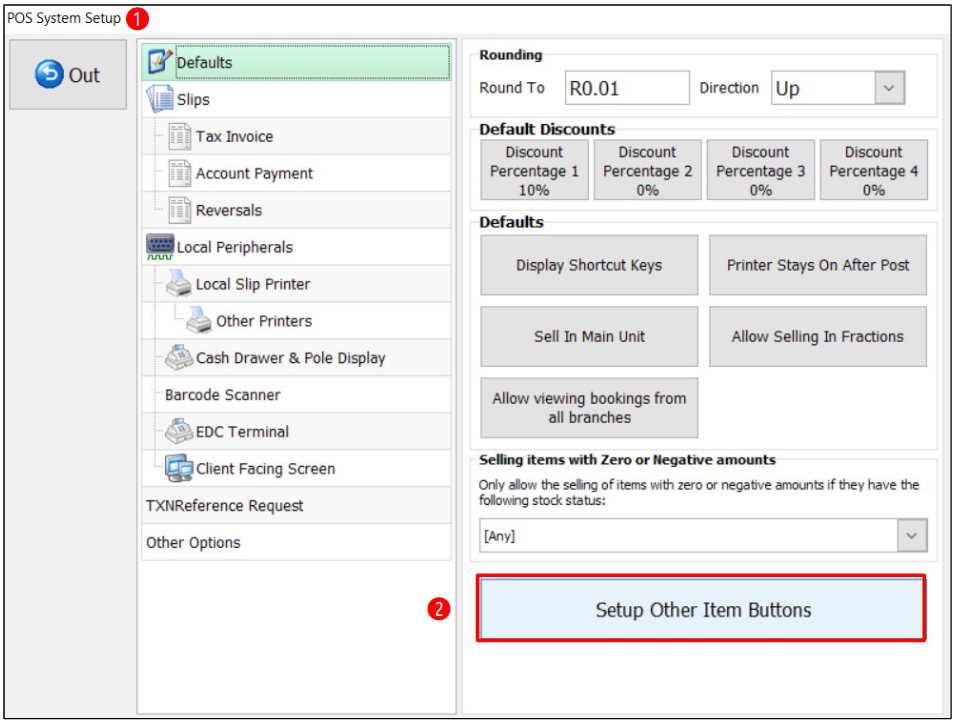
❶ POS System Setup window
หน้าต่าง POS System Setup
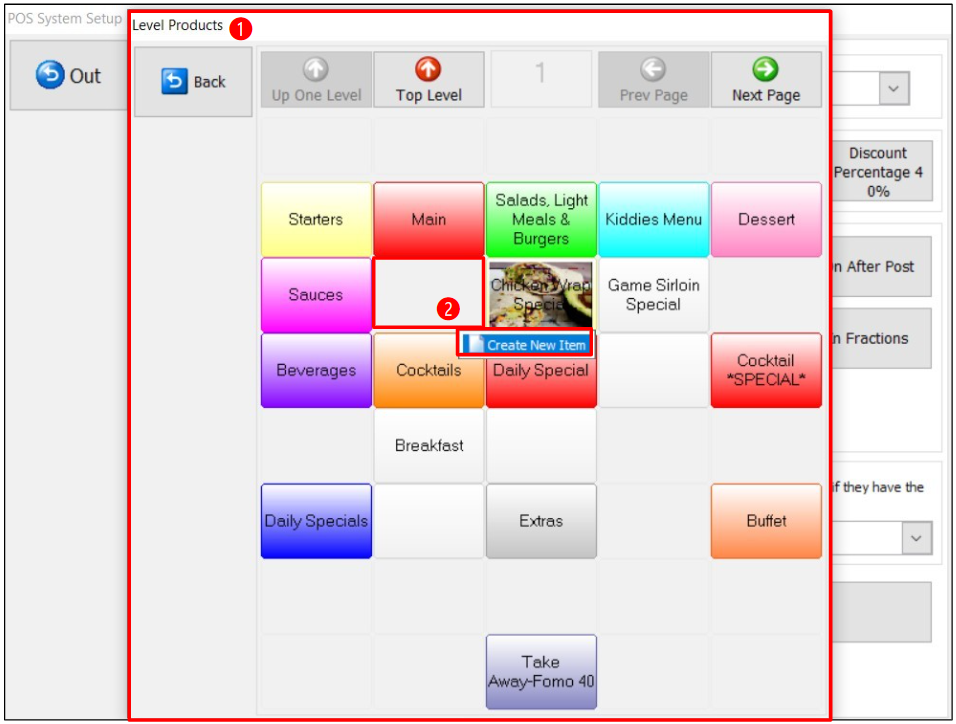
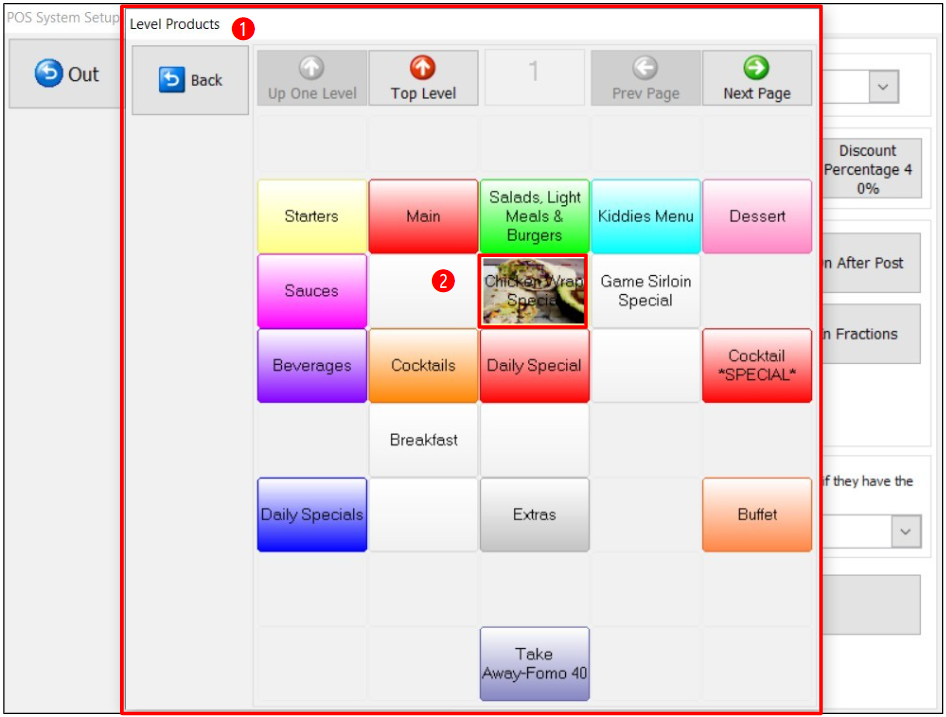
❶ Level Products window
หน้าต่าง Level Products
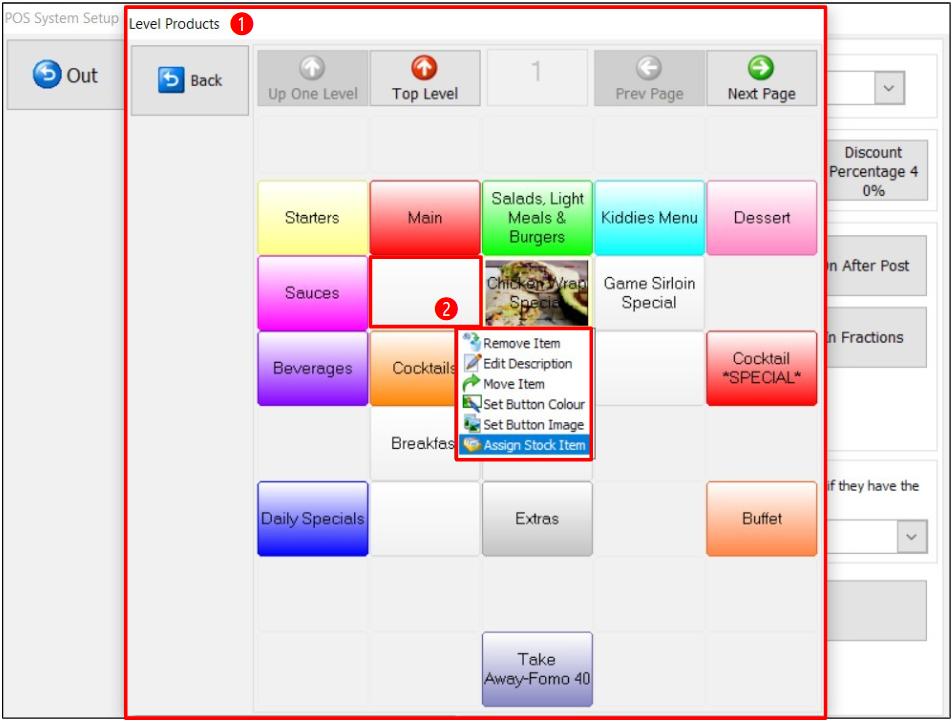
❶ Level Products window
หน้าต่าง Level Products

❶ Select Stock Item window
หน้าต่าง Select Stock Item
❷ For Text – Fast-Search: type in the description of the required item
สำหรับข้อความ - การค้นหาอย่างรวดเร็ว: พิมพ์คำอธิบายของสินค้าที่ต้องการ
➌ Locate & Select: select to highlight the required item
ค้นหาและเลือก: เลือกเพื่อไฮไลท์สินค้าที่ต้องการ
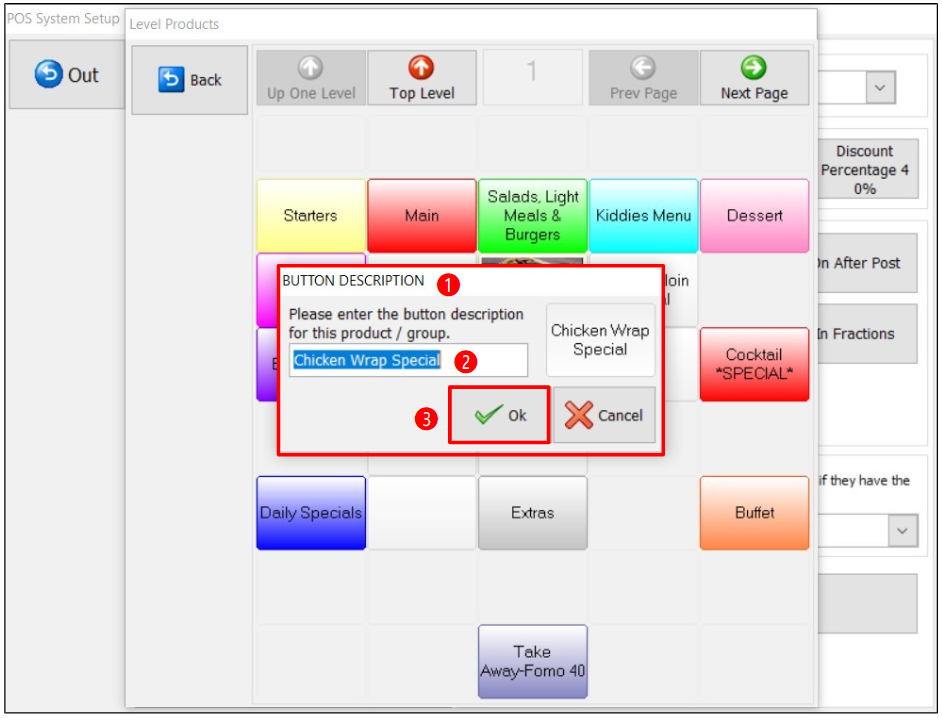
❶ Button Description window
หน้าต่าง Button Description
❷ The Description of the Item
ชื่อรายการสินค้า
❶ Level Products window
หน้าต่าง Level Products
If you need a consulting system and ERP system for a service business. (Golf software hotel management software
Resort management software Event management software, restaurants, food and beverage and central kitchen
management software, spa software, wholesale retail management Franchise management and other service
businesses)
You can contact CiMSO ERP Software for a short demonstration (free online) at 02-1296312 or


