
![]()
Log in Shopkeeper
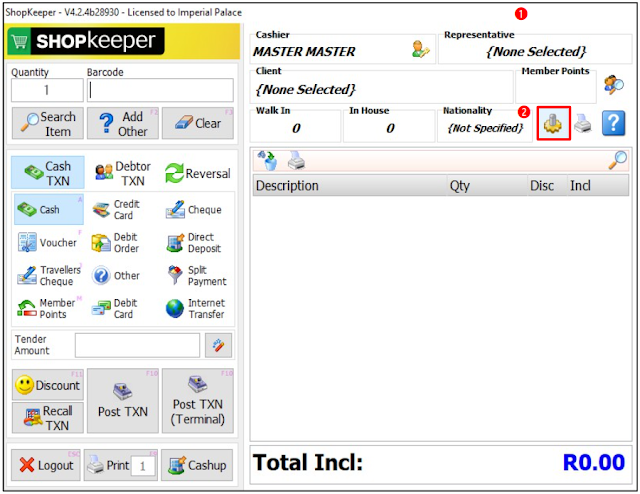
❶ ShopKeeper window
หน้าต่าง ShopKeeper
เลือกการตั้งค่าระบบ (ปุ่มฟันเฟือง)
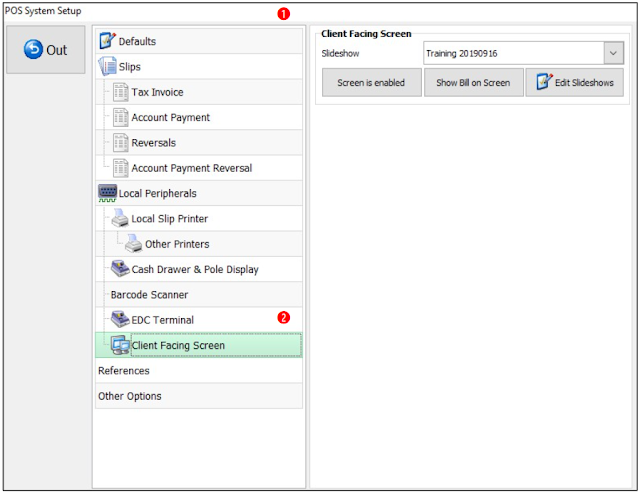
❶ POS System Setup window
หน้าต่าง POS System Setup
❷ Client Facing Screen option
ตัวเลือกหน้าจอที่หันไปทางลูกค้า
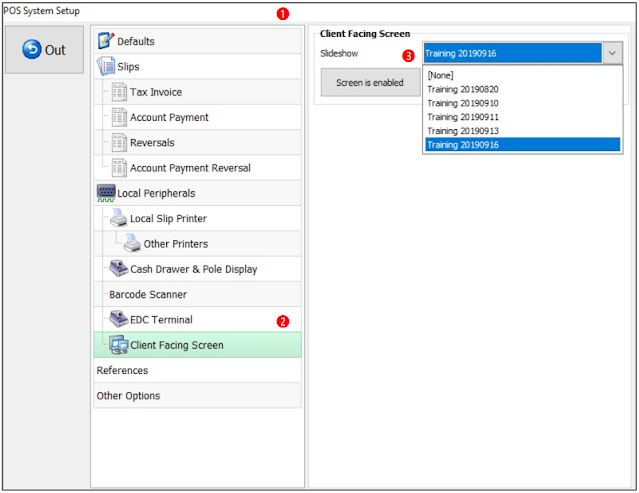
❶ POS System Setup window
หน้าต่าง POS System Setup
หน้าต่าง POS System Setup
❷ Client Facing Screen option
ตัวเลือกหน้าจอที่หันไปทางลูกค้า
➌ Slideshow: use the drop down to access the list of options
การนำเสนอภาพสไลด์: ใช้เมนูแบบเลื่อนลงเพื่อเข้าถึงรายการตัวเลือก
Note: you are able to create a new Slideshow
หมายเหตุ: คุณสามารถสร้างการนำเสนอภาพสไลด์ใหม่ได้
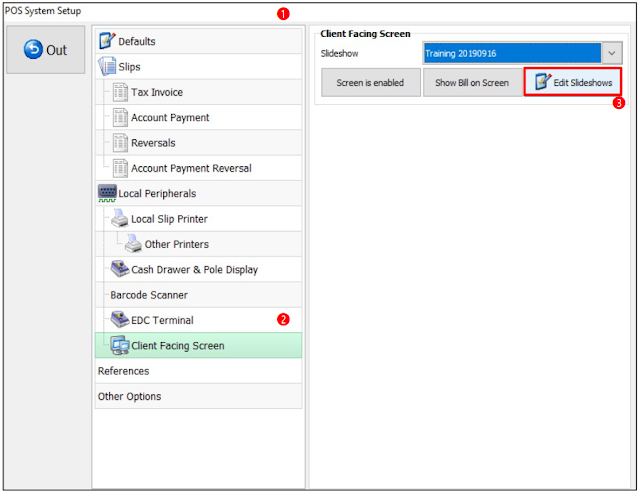
❶ POS System Setup window
หน้าต่าง POS System Setup
❷ Client Facing Screen option
ตัวเลือกหน้าจอที่หันไปทางลูกค้า
➌ Select the Edit Slideshows button
เลือกปุ่มแก้ไขการนำเสนอภาพสไลด์
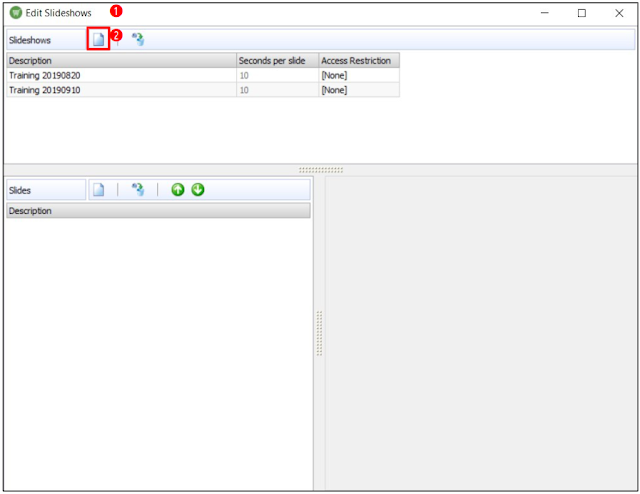
❶ Edit Slideshows window
หน้าต่างแก้ไขการนำเสนอภาพสไลด์
❷ Select the Create New Playlist (page button)
เลือกปุ่มสร้างเพลย์ลิสต์ใหม่ (ปุ่มหน้ากระดาษ)
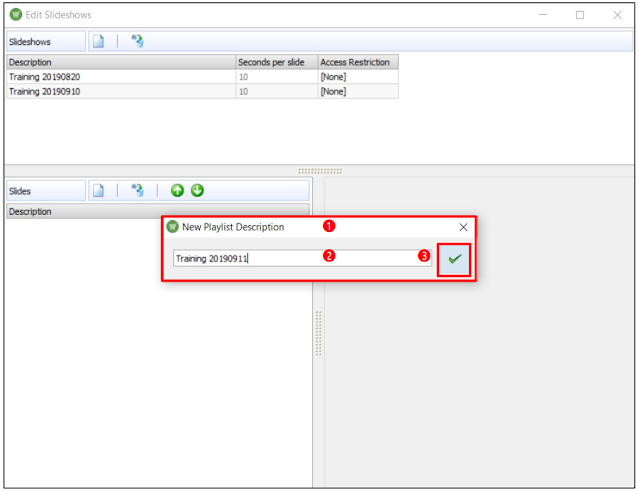
❶ New Playlist Description window
หน้าต่าง New Playlist Description
❷ Type in the Description
พิมพ์คำอธิบาย
➌ Select the Accept (green tick button)
เลือกปุ่มตกลง (ปุ่มติ๊กสีเขียว)
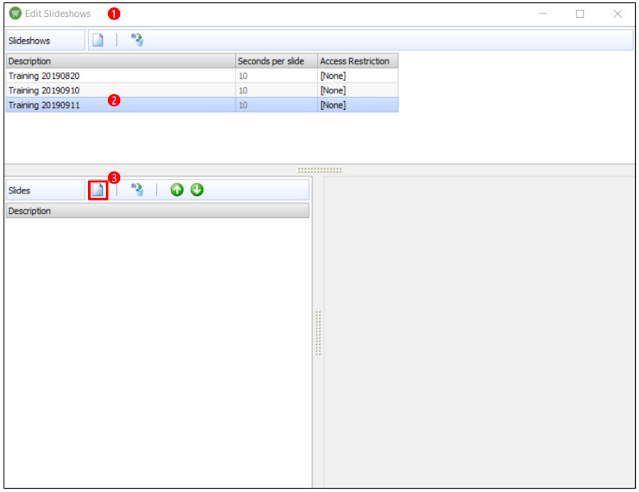
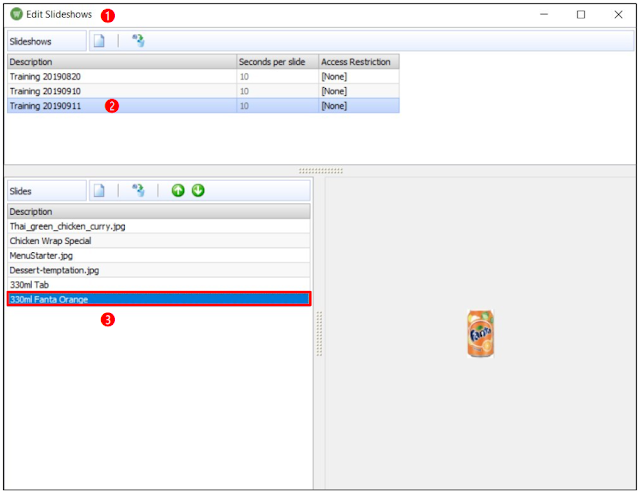
❶ Edit Slideshows window
หน้าต่างแก้ไขการนำเสนอภาพสไลด์
❷ The Created Playlist
เพลย์ลิสต์ที่สร้างขึ้น
➌ Select the Create New Playlist Entry (page button)
เลือกปุ่มสร้างรายการเพลย์ลิสต์ใหม่ (ปุ่มหน้ากระดาษ)
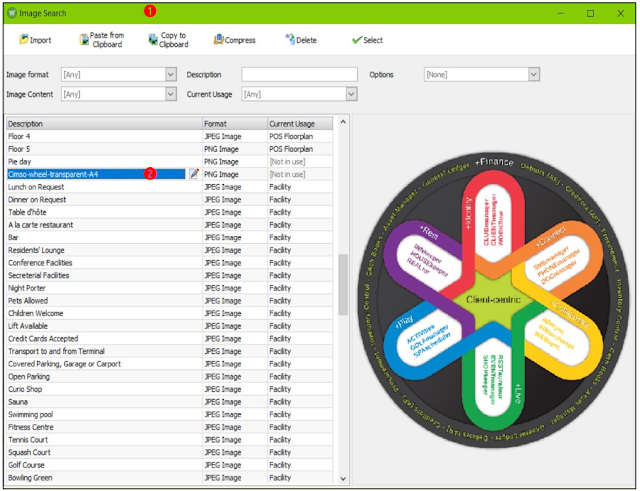
❶ Image Search window
หน้าต่าง Image Search
❷ Locate & Select: select to highlight the required image
ค้นหาและเลือก: เลือกเพื่อไฮไลท์ภาพที่ต้องการ
เลือกปุ่ม Select
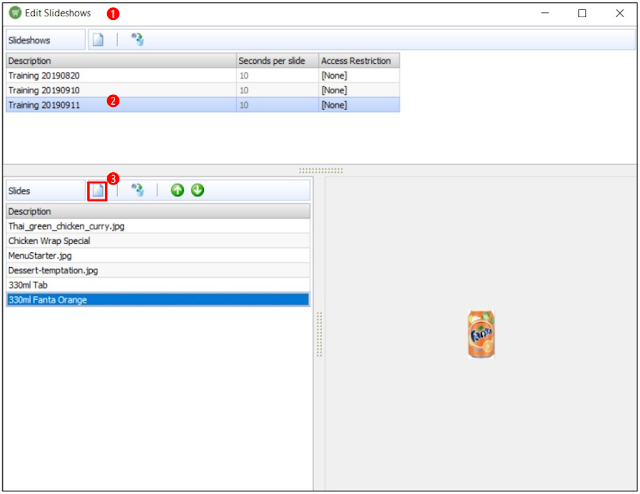
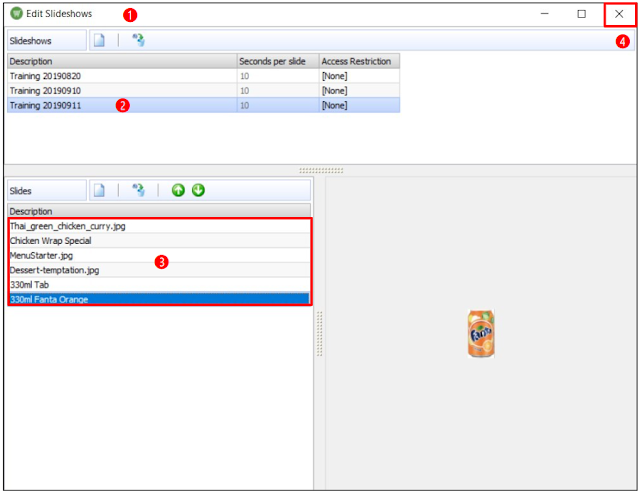
❶ Edit Slideshows window
หน้าต่างแก้ไขการนำเสนอภาพสไลด์
❷ The Created Playlist
เพลย์ลิสต์ที่สร้างขึ้น
➌ Select the Create New Playlist Entry (page button)
เลือกปุ่มสร้างรายการเพลย์ลิสต์ใหม่ (ปุ่มหน้ากระดาษ)
❶ Edit Slideshows window
หน้าต่างแก้ไขการนำเสนอภาพสไลด์
❷ The Created Playlist
เพลย์ลิสต์ที่สร้างขึ้น
➌ Select the Create New Playlist Entry (page button)
เลือกปุ่มสร้างรายการเพลย์ลิสต์ใหม่ (ปุ่มรูปหน้ากระดาษ)
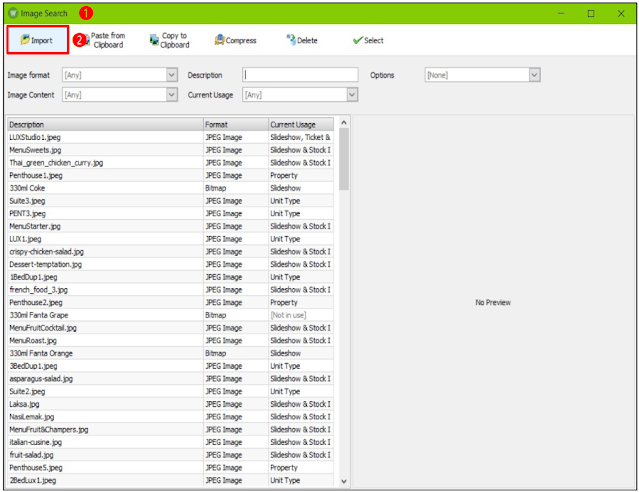
❶ Image Search window
หน้าต่างค้นหาภาพ
❷ Select the Import Image button
เลือกปุ่มนำเข้าภาพ
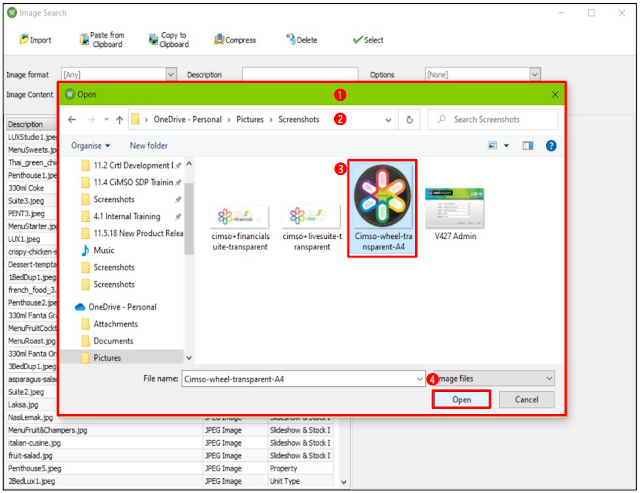
❶ Open window
หน้าต่าง Open
❷ File / Folder location (where image to be imported from)
ตำแหน่งไฟล์ / โฟลเดอร์ (ที่ภาพจะถูกนำเข้ามาจาก)
➌ Locate & Select: select to highlight the required image
ค้นหาและเลือก: เลือกเพื่อไฮไลท์ภาพที่ต้องการ
➍ Select the Open button
เลือกปุ่ม Open
❶ Image Search window
หน้าต่างค้นหาภาพ
❷ The Added Image
ภาพที่เพิ่มเข้ามา
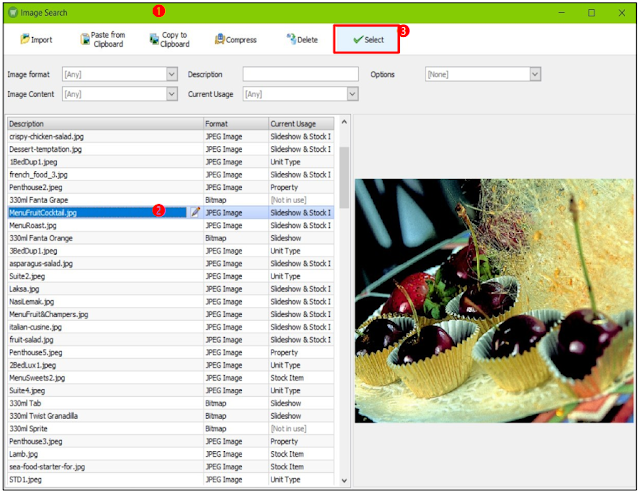
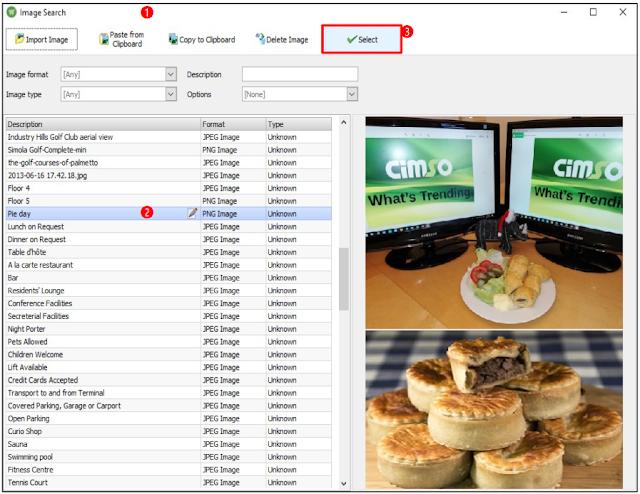
❶ Image Search window
หน้าต่างค้นหาภาพ
❷ Locate & Select: select to highlight the required image
ค้นหาและเลือก: เลือกเพื่อไฮไลท์ภาพที่ต้องการ
➌ Select the Select button
เลือกปุ่ม Select
❶ Edit Slideshows window
หน้าต่างแก้ไขการนำเสนอภาพสไลด์
❷ The Selected Playlist
เพลย์ลิสต์ที่เลือก
➌ The Created Playlist Entry
รายการเพลย์ลิสต์ที่สร้างขึ้น
➍ Select the Close (x button)
เลือกปุ่มปิด (ปุ่ม x)

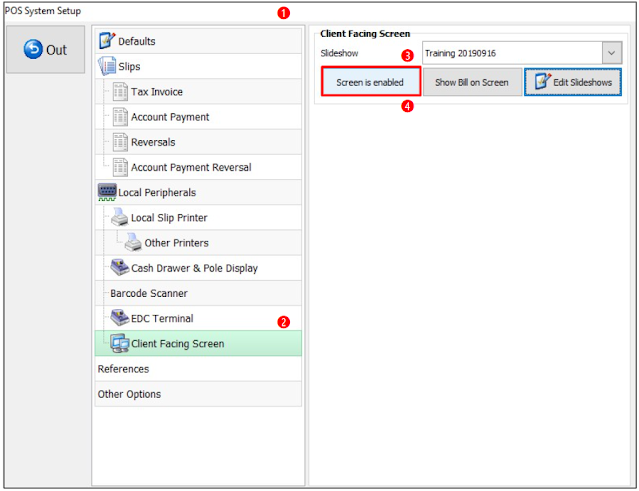
❶ POS System Setup window
หน้าต่าง POS System Setup
❷ Client Facing Screen option
ตัวเลือกหน้าจอที่หันไปทางลูกค้า
➌ Slideshow: use the drop down to access the list of option – select the required Slideshow
การนำเสนอภาพสไลด์: ใช้เมนูแบบเลื่อนลงเพื่อเข้าถึงรายการตัวเลือก – เลือกการนำเสนอภาพสไลด์ที่ต้องการ
❶ POS System Setup window
หน้าต่าง POS System Setup
❷ Client Facing Screen option
ตัวเลือกหน้าจอที่หันไปทางลูกค้า
➌ Slideshow: selected Slideshow
การนำเสนอภาพสไลด์: การนำเสนอภาพสไลด์ที่เลือก
➍ Select the Screen Is Enabled button, for the Slide show to be visible
เลือกปุ่มหน้าจอเปิดใช้งาน เพื่อให้การนำเสนอภาพสไลด์สามารถมองเห็นได้
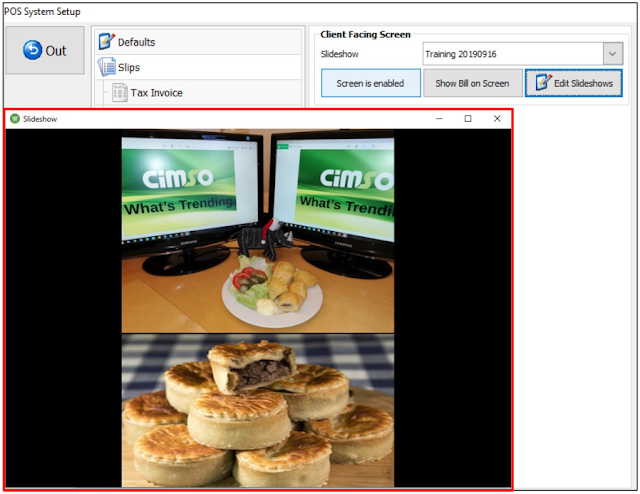
View of the Items added for the Slide Show
การแสดงรายการของที่เพิ่มเข้ามาสำหรับการนำเสนอภาพสไลด์
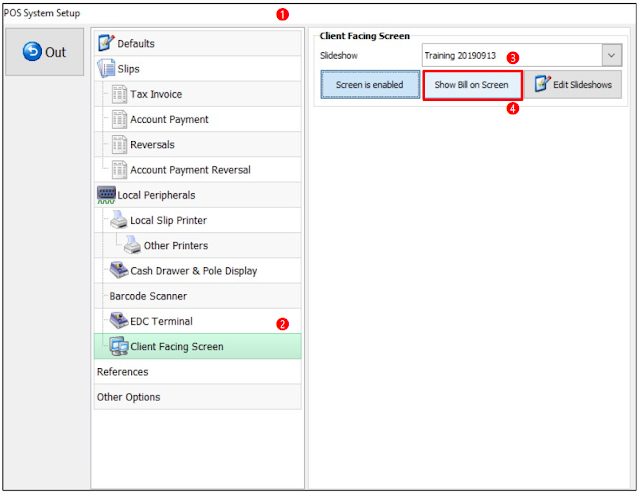
❶ POS System Setup window
หน้าต่าง POS System Setup
❷ Client Facing Screen option
ตัวเลือกหน้าจอที่หันไปทางลูกค้า
➌ Slideshow: selected Slideshow
การนำเสนอภาพสไลด์: การนำเสนอภาพสไลด์ที่เลือก
➍ Select the Show Bill On Screen button, for the Slide show to be visible
เลือกปุ่มแสดงบิลบนหน้าจอ เพื่อให้การนำเสนอภาพสไลด์มองเห็นได้
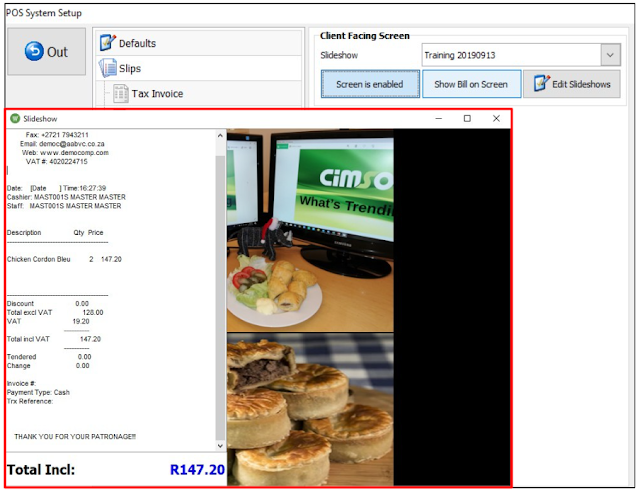
View of the Items added for the Slide Show and the Bill visible
การแสดงรายการที่เพิ่มเข้ามาสำหรับการนำเสนอภาพสไลด์และบิลที่มองเห็นได้
Contact us
If you need a consulting system and ERP system for a service business. (Golf software hotel management software
Resort management software Event management software, restaurants, food and beverage and central kitchen
management software, spa software, wholesale retail management Franchise management and other service
businesses)
You can contact CiMSO ERP Software for a short demonstration (free online) at 02-1296312 or


